In most cases, the buyer will not be responsible for the actual handling and setting of the slats on a new building or remodeling project. But since improper handling procedures can influence the useful life of the slats, it is essential to understand the correct methods for delivering and setting slats to minimize any damage.
Transport
Use trailers equipped with Air Ride suspension to minimize damage to slats during transportation caused by bouncing.
Tie down straps should be placed as close as possible to the dunnage. Do not place straps outside of the dunnage. After 50 miles of travel, the driver should stop and check the tightness of the straps.
Handle the slats as little as possible.
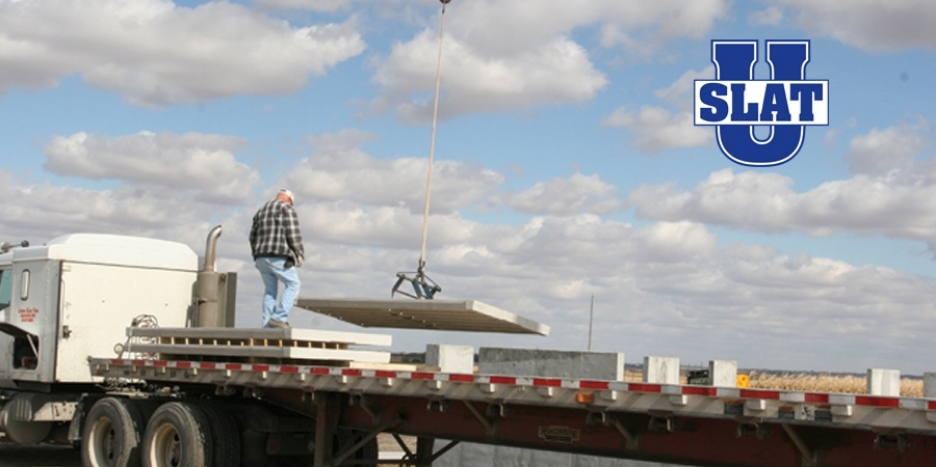
Ideally, the slats should be set directly off the truck into the building with a crane or boom truck. Use a properly designed and rated slat hook that lifts the slat under the center cross support to minimize stress on the slats, as they are set. Only one slat at a time should be picked up with the slat hook.
If it is not possible to set the slats directly it is essential they are correctly stored on the site.
Create a level storage site as close to the building as possible — compact the ground in the storage area to prevent slats from sinking and sifting.
To prevent breakage to slats caused by transporting over rough terrain, use a forklift with pneumatic tires and level the ground under the delivery truck. Make the forklift pathway as smooth as possible and drive with extreme care to minimize damage from bouncing.
Pad the fork masts with a piece of old rubber tire to prevent slats from bumping directly against the steel. Adjust the forks as wide as possible, so they are as close to the wood dunnage (wood spacers) as possible. If lifting more than two slats at a time move the forks outside the wood dunnage.

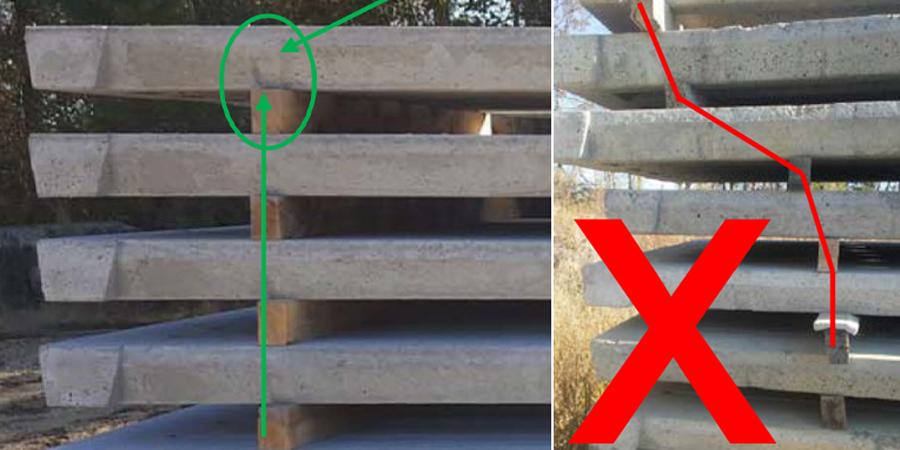
Place the wood dunnage on the ground and between each slat in a straight vertical line. Slats are indented on the sides to provide a clear visual aid for placing the dunnage at the proper location.
Never stack stored slats more than four high.
Setting Procedures
Adjust slats for levelness with plastic or stainless steel shims; never use wood or plain steel.
Slats should be supported a minimum of two inches on wall or lintels.
We never recommend cutting slats, as this will expose metal reinforcing to premature corrosion and deterioration. If slats must be cut, coat the exposed metal with a sealant. NEVER cut through an individual slat.
Any minor chipping of slats, occurring during setting, can be patched with fasting setting slat patch such as Con-Korite Mortar.
Slats around wet/dry feeders and waterers are subject to additional due to constant contact with feed and water. It is highly recommended to provide additional protection to the slats by using epoxy coatings such as Armor-Rock.
Do not store excessive building materials on the slats after setting, which may exceed design loads.
Visual Inspection of the slats.
Steel reinforcing placed in the slats during manufacturing will not prevent all small cracks from occurring during handling. Some amounts of smaller tension cracks are normal and should be expected with precast concrete products.
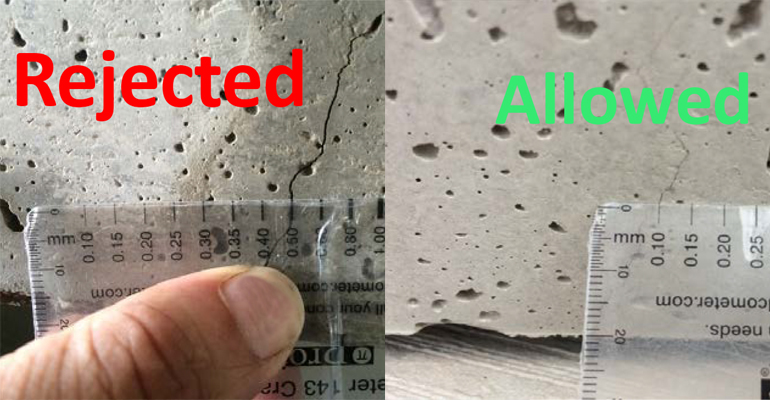
Top and bottom tension cracks should not extend more 2.25" in length and shouldn't be more .5 mm in width. In no case should the cracks extend across the full width or depth of an individual slat.

Tension cracks can be measured with Elcometer Crack Width Rulers, which are small, inexpensive tools, used to measure cracks in concrete. Typically, the ruler is the size and shape of a credit card. They can be purchased online at www.hogslat.com. Part # E143.

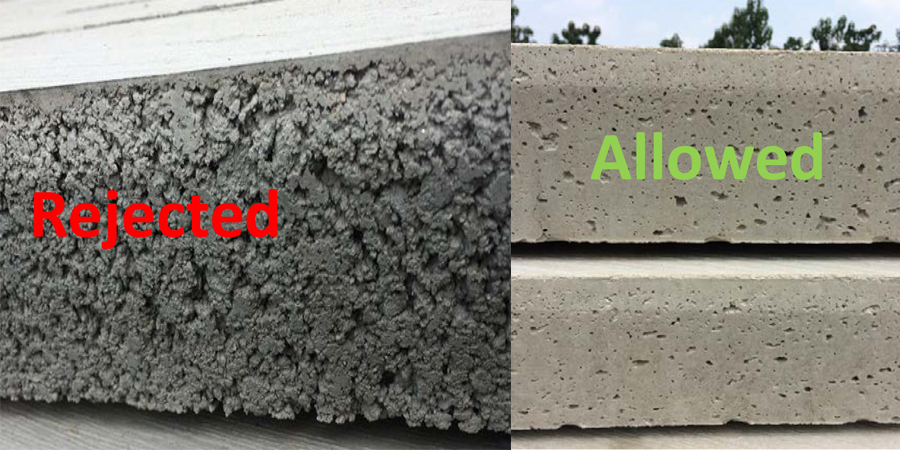
One other area of a slat's visual appearance deserves discussion. It is normal for small "bug holes" to be present on the sides and bottom of dry cast slats. These small voids also exist with wet cast slats but are covered by a thin layer of cement paste left after slats are pulled from the mold. These "bug holes" are normal and completely different than "honeycombed" concrete which is most commonly caused by improper vibration directly after the concrete is poured.
For a more in-depth look at concrete slats covering the handling and setting click this link to The Owner's Manual for Precast Slats.


 Україна
 Méjico


