Close
0
You have no items in your shopping cart.
Search
Filters
RSS

Blog

WeatherFlow - Wind Meter for Your Smartphone

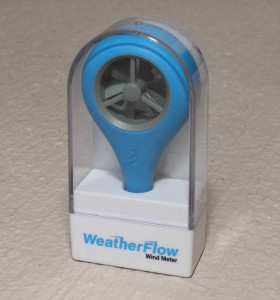
ITM-WeatherFLow in package-IMG 

The old saying, “ You can’t improve what you can’t measure,” applies to measuring wind speed in a hog or poultry house.  Gauging wind speed of tunnel ventilation or velocity out of an inlet without an anemometer (wind meter) is like trying to regulate building temperature without a thermostat.

The WeatherFlow wind meter is a great new product that allows you to use your smartphone as an anemometer.  At only $35, it is so affordable that every producer should add it to their ventilation “toolkit.” View our setup and use demonstration below to see just how easy the WeatherFlow wind meter is to use.

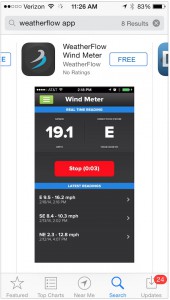
WeatherFlow app

First download the FREE app
at either the Apple store or Google play store.

WeatherFlow Start Screen

Then open the app and click on

the small green box in the upper left-hand corner.

WeatherFlow Settings

Click on Settings

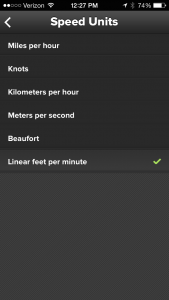
WeatherFlow FPM

Click on Speed Units and set it to Linear Feet per Minute

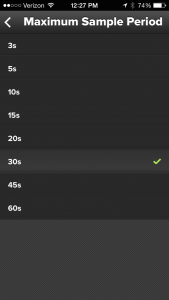
WeatherFlow Time

Next click on Maximum Sample Period and Set it to 30s

WeatherFlow Take reading

Now just plug the WeatherFlow into your smartphone’s earphone jack,
and you are ready to take your first measurement.
Click on Take a Reading 

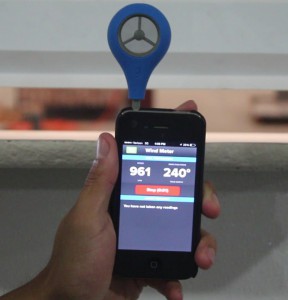
WeatherFlow with phone

Hold the wind meter away from your body and about five feet off the floor.

Take the measurements at least 40’ from the tunnel fans.
Measurements should be taken on a calm day as windy days can influence readings inside the house.
For the most-accurate results, take a reading 30 seconds long and repeat with a pause of one minute in between.

To order your WeatherFlow wind meter go to http://www.hogslat.com/weatherflow-wind-meter.

Comments (0)
Hog Slat Wrote the Book on Sow Group Housing

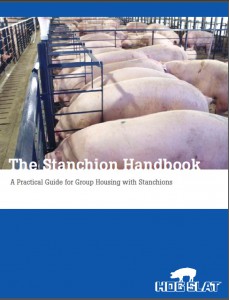
stanchion handbook cover

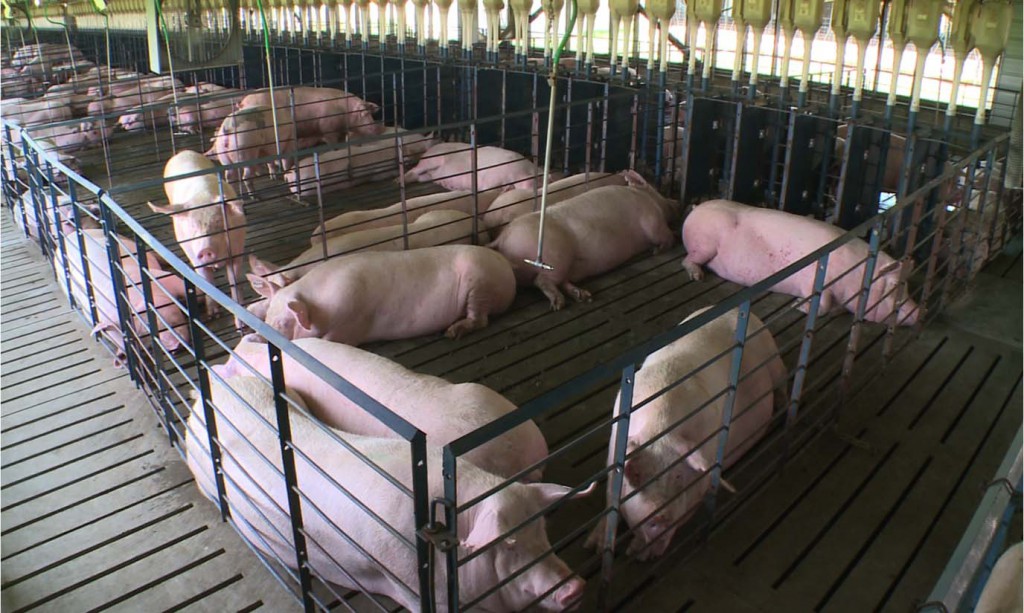
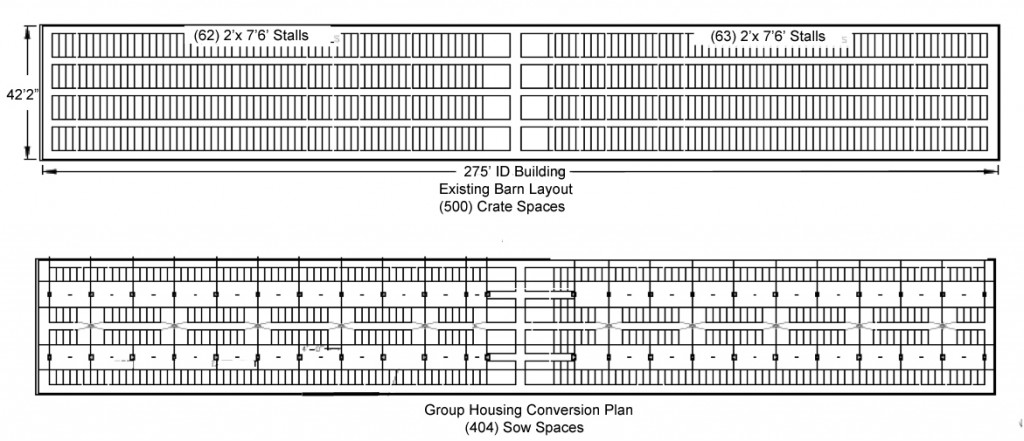
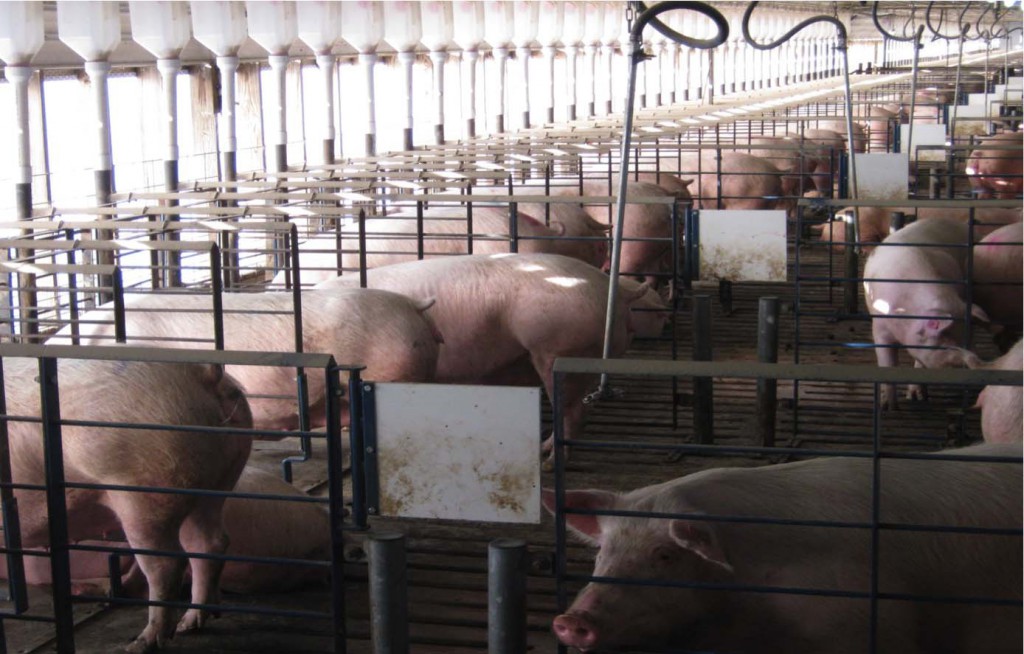
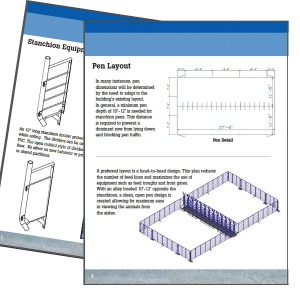
The handbook begins by comparing merits of different systems available for group housing. Complete with illustrated pictures of equipment and diagrams of building layouts, this 16 page handbook contains practical details needed to build new sow housing or convert existing stalls to group housing.

Stanchion pages

Download your FREE Stanchion Handbook


Comments (0)
Grower Select Curtain Machine

In our blog post highlighting Hog Slat’s engineering department (see Engineering Grower Select) Frank remarked, “In almost every case we can look at existing products and make improvements.”

The GrowerSELECT® Curtain Machine is a great example of making changes to existing products to improve performance and reduce maintenance.

curtain machine keyhole

If you have ever “hung” a curtain machine, you will appreciate this feature. After placing a lag bolt in the wall about ½” short of flush, you simply hang the machine from a single keyhole slot in the back of the cabinet. It is much easier to level and add the four mounting lag bolts because the unit remains supported.

Curtain machine top

The Curtain Machine includes three sealed ball bearing head pulleys instead of two.  The extra pulley is added to increase the choices for installing the main cables.  Use the two outside pulleys to cable the machine on both sides of the building.  Single-sided installations have the off side cable routed through the top pulley.

Curtain machine drive block

One of the highest mortality items on a screw type machine is the load block.  Other curtain machines use bronze, brass or nylon. However, the GrowerSELECT machine utilizes a self-lubricating, low friction acetal plastic for both the insert nut and load block slides.   For a more in-depth comparison see our blog post, “More Than You Ever Wanted to Know about Curtain Machine Load Blocks.”

Curtain machine Aux switch

The Curtain Machine features dual limit switches.  The primary limit switches set the travel length, with secondary or redundant switches backing these up. If the first switch fails and engages the secondary switch, the machine shuts down and must be serviced before operating again.  Also included is an auxiliary switch, used to activate a fan after the curtain closes.  Other brands charge extra for this feature.

Curtain machine switches

Another feature you will appreciate is the local control switches, standard with the GrowerSELECT Curtain Machine.   A toggle switch sets the machine in manual and overrides the ventilation control.  This is a great safety feature that prevents anyone from activating the unit while it is being serviced.  In addition, it certainly makes it easier to set the limit switches compared to performing this task from a remote controller.

GS Curtain machine close up mounted_edited-1

Eventually, any curtain machine will have to be serviced, and this is where the GrowerSELECT Curtain Machine shines.  Note the cutouts in the galvanized housing. You can slip the entire motor assembly out of these slots after loosening three mounting bolts.  It is much easier to service the motor outside of the cabinet.

The entire screw assembly will also come out through these cabinet slots.  It’s still a big job, but it’s possible to slide the entire assembly out for servicing rather than dismantling the screw inside the cabinet.

Although not groundbreaking, the GrowerSELECT Curtain Machine is an example of Hog Slat’s commitment to engineering better products.  Click on Curtain Machine for pricing and ordering information.

Comments (0)
Clear Advantage for Clear Feed Tray

Hog Slat/ Georgia Poultry stores just received their first shipments of a new type of feed tray.  Manufactured from post-consumer waste, the Pur-Chick Clear Feeder Tray is different than the paper or plastic trays currently in use.

itm-521102-clr-img

They are crystal clear, lightweight, disposable and appear to have some advantages over red plastic and paper trays.

There seems to be less Darkling beetle activity in the clear trays.  I asked several industry “bug experts”, and they weren’t sure why.

“Maybe it’s because they can’t hide under the clear tray.”

“The sides might be too slick for the beetles to climb.”

“They can’t eat through the plastic as easy as the paper tray.”

Watch the first part of the video and see for yourself.

Chicks seem to be attracted to the clear trays over paper or red plastic.  Again, not sure exactly why.

 “They can see the feed better because the trays are clear.”

“The reflective surface might look like water.”

“When they walk on the tray, it makes a crinkling sound which they are familiar with from the hatchery.”

Maybe. Watch the video and decide for yourself.

To order go to http://www.hogslat.com/pur-chick-clear-feeder-tray

Part # for individual trays is 521102-CLR
Bundles of 200 are part# 521102-CLR-BUND

Comments (0)
More Than You Ever Wanted to Know about Curtain Machine Load Blocks

Nearly all of Hog Slat’s competitors try to dismiss the GrowerSELECT® product line as “just a cheap copy.” However, every time I work with Hog Slat’s engineering department I realize how misguided this perception is.  Nothing is ever “just copied.”

Image of curtain machine load blocks on a table

I was quizzing Hog Slat engineer, Tim King, about the features and benefits of GrowerSELECT’s Curtain Machine.   He explained to me that one of the highest replacement items on a screw type machine is the load nut. As the load block moves up and down the Acme screw, the friction generated causes the insert to fail.  If friction is reduced, wear and maintenance of the insert is reduced.

Curtain Machine loads block compared

1. Grower Select – Aluminum Block/Acetal Insert
2. Brass Block
3. Aluminum Block/ Brass Insert
4. Steel Block/ Nylon Insert

For the GrowerSELECT Curtain Machine, Tim selected acetal plastic to be used for the insert and cabinet slides.  Acetal is one of the strongest non-reinforced plastic available to replace metal bushings.  It is able to reduce friction within the curtain machine because of its low friction coefficient.  So why is this plastic a better choice than the brass or nylon inserts shown in the pictures?

To get a better understanding of Coefficients of Friction, consider these ratings of various materials used for bearings.

Steel on steel dry contact is .80, if you apply grease it becomes .16

Brass on steel dry contact is .35, grease it and it is now .19

Nylon on steel dry contact is .25 and with lubrication moves to .15

Acetal on steel dry rating is .15.

Curtain Machine inserts

1. Nylon
2. Grower Select Acetal
3. Brass block
4. Brass insert

These ratings aren’t telling anyone anything they didn’t already know. Keep a bearing greased, and it will last a long time. What is interesting though is the rating for an acetal load nut without grease is the same as any of other insert materials with grease.

As a matter of fact, the acetal load nut does not even have a grease zerk.  However, we still recommend greasing the Acme shaft with general purpose Lithium grease, primarily to prevent surface rust on the shaft.

I wish you could put your hands on the four inserts in the picture.  The acetal has a slippery, almost oily feel to it; different than the nylon insert.  It is a denser, heavier plastic that is less brittle compared to nylon.

The real advantage is in the day-to-day maintenance on your farm.  The best intentions (like greasing a curtain machine) get lost in the bustle of all the work.  Why not choose a curtain machine with features that reduce maintenance?   Click on Curtain Machine for more information.

Comments (0)
Pen Vise is the Right Tool for Cleaning Brooder Orifices

Having the right tool makes any maintenance chore easier and Hog Slat’s Pen Vise is the perfect tool for cleaning clogged brooder and heater orifices.

Pen Vise

Instead of  looking for a piece of wire or a drill bit close to the right size, the Pen Vise keeps tapered cleaning needles at your fingertips.  This tool features a screw-tightened jaw on one end with a 12-needle storage compartment on the opposite. An additional benefit;  you’re not as likely to lose the five-inch long Pen Vise if you happen to drop it into the liter.

Dan Yates, the hands and voice in the video, has used the same Pen Vise for over five years.  He offered these suggestions,

“The needles taper down to a smaller size than we need for our applications.  If you clip about 1/2″ off the end with a side cutter, you won’t bend the end like I did in the video.”
 
“A needle is just a better tool than a drill bit for cleaning heater orifices. Repeated use of a drill bit can enlarge the hole causing a weak, yellow flame with poor combustion.”

Click here to order your  Pen Vise today.


Comments (0)
L&L Farms combines SowMAX and Grow-Disk™

Located in McLeansboro, IL, L&L Farms began their hog farming operation in 1994 raising 400 sows. Since then, Jeff and his family along with the help of quality employees have grown their breed to wean operation to 4,000 sows housed in 2 locations.  We spoke with owner, Jeff Lueke:

074Jeff, you have purchased several Grow-Disk™ systems, why did you decide to install this feeding system?

I really felt like we were gaining efficiencies in the farrowing department. We saw how it could provide advantages to our employees, allowing them to be more efficient and manage more sows. Within our operation we also set target goals. These goals consisted of narrowing down the wean to first service interval, drive a heavier pig out the door at weaning, and increase lactation length leading to subsequent larger litter sizes for pigs. In our management plan, we felt that these two products, SowMAX and Grow-Disk, would be a big help to reach our target goals by getting more feed to the sows.

How many Grow-Disk™ systems have you installed?

3. All have been installed into our farrowing barns, but I would not hesitate to install them into any application.

How do you use Grow-Disk™ to feed the sows?

We combine the Grow-Disk with the SowMAX. We feel that the combination of these products delivers a very good program. We basically want the sows to have access to full feed. Between these two products we feel that we can deliver that to our sows very efficiently. The system still gives us flexibility to limit feed intake because we include the Sow Drop. The Sow Drop allows us to limit feed intake if we want to, whether it is in early lactation, pre-farrowing, or for the first three days post-farrowing. In post-farrowing we schedule to feed five times throughout the day, in pre-farrowing we schedule to feed twice a day.

How have the Grow-Disk™ systems performed for you? What benefits have you seen?

I have no complaints; I do believe that we are getting more daily feed intake from our sows with the system. The system is hands-off, requiring less labor to feed. With this automatic feeding we are able to keep feed available, and produce less wastage.

Why did you choose Grow-Disk™ instead of a flexible auger system for your project?

My local sales contact, Carl Herrmann, shared with me some of the advantages that Grow-Disk can offer. Knowing that it was a new product, and knowing that I’ve had success with Hog Slat products in the past, it made me anxious to try it. I think its heavy duty, reliable, and I have not been disappointed.

Switching gears, tell us about your routine feeding with SowMAX.

The system that we set up is basically designed to keep feed available for the sow to access at all times, but not have so much feed supply that if there was a malfunction we would have a pit full of feed. The system allows us to make that work. At most any time there’s 12-20 lbs. of feed available to the sow. If that particular sow wants to get up at 6 a.m. and eat 15 pounds of feed, it’s there. If a sow wants to eat five small meals throughout the day she has the opportunity to do that as well. I think that we forget that hogs are somewhat individuals like people, and may all have a little different idea of how they want to eat. In the past when we fed with a scoop and cart, the sows got trained to jump up and eat whenever it was time to feed. Even if a litter of piglets just started nursing, the sow still jumped up to eat. The sows are much more content and apt to eat at their convenience than they are when you decide when it’s time to feed.  For daily management of the SowMAX, we clean and make necessary adjustments to the feeders twice a day. We have been able to keep SowMAX feeders cleaner compared to other systems. The feeders are simple and easy to utilize and maintain.

What advantages have you noticed with SowMAX over how you fed sows in the past?

We have been able to accomplish our management goals by incorporating SowMAX into our operation. I do believe we have raised heavier pigs. We have noticed that SowMAX wastes less feed and requires less maintenance compared to a solid tube. Having the ability to keep fresh feed in front of the sow all day has been a great benefit.

Do you use any other Hog Slat equipment?

We incorporate Hog Slat’s concrete slats, penning, boar carts, Sow Drops, farrowing crates, and Tridek flooring, among others into our operation.  I’ve found this equipment to meet my standards for over 20 years.

Do you have any suggestions for other hog farmers looking into the GrowerSELECT® product line?

It’s a viable program that should be looked at. I think it is cost efficient for the performance. It would be an asset to any building project.

Comments (0)
Poultry Lighting- Advantages of LED Bulbs

1. Incandescent bulbs are being phased out by numerous countries (US included) making it now illegal to manufacture many incandescent bulbs leaving only those bulbs still in supply to sell. Usually the higher the wattage the more expensive and more difficult the bulb is to find now with the new laws in effect. LED bulbs do not face this issue and benefit from newer technology that is developing each year.

2. Incandescent bulbs are not efficient at all in terms of converting energy for just light production. Most of the energy is released as heat and not as light thus making them very inefficient. In contrast, LED bulbs convert nearly all their energy to light production and are very efficient. For example a 40 watt incandescent produces roughly 400 Lumens which is a little less than the average 8 watt LED bulb that produces about 450 Lumens. This fact alone makes it easy to see how LED bulbs can pay you back in energy savings over time, by giving you the same Lumens (light output) for much less electrical usage.

3. Incandescent bulbs have a typical lifespan of about 2,000 hours or less, CFL and Cold Cathode bulbs around 10,000 hours, and LED’s can have a lifespan over 25,000 hours. This means less time and labor required to change bulbs by switching to LED bulbs.

4. LED bulbs don’t lose their intensity like Cold Cathode does. Some research shows that after time Cold Cathode bulbs lose light intensity the older they get.

5. Our LED bulbs are fully dimmable and can be dimmed as low as 1%. They do not have issues like CFL bulbs do when dimming at lower levels and work on nearly all dimmers.

6. LED bulb warranties are longer. Most agricultural rated LED’s have a minimum of a 3 year warranty and some go as high as 5. Incandescent bulbs do not have a warranty and CFL and Cold Cathode bulbs usually only have a 1 year warranty.

7. Not all LED bulbs are alike. Do not confuse Agricultural rated LED bulbs and residential LED bulbs. They are not the same, and do not dim the same and thus do not perform the same. They may be more attractive due to their lower price, but they will not hold up in your poultry house like the agricultural rated LED’s will.

8. Some electrical companies, co-ops, and federal grants offer rebates or cost share programs that may be available in your area. Contact your local USDA Rural Development office to inquire about the REAP program or ask your electricity supplier for any rebates they may offer

9. By changing out incandescent bulbs to LED bulbs some have shown a payback as quickly as a few flocks, and if you are changing from CFL or Cold Cathode bulbs the payback can be around 1 to 2 years depending on your lighting program and setup. Regardless, know that by changing to LED you are cutting your energy usage, putting money back in your pocket, having a more durable and longer lasting bulb, and a bulb with a better warranty. Take the next step and invest in LED bulbs today!

Comments (0)
History of Sow Housing

I was scrolling the web for information on sow housing and ran across this piece authored by John J. McGlone, PhD at Texas Tech University.  Here are some highlights:

First mention of sow stalls was in 1807 in Baxter, England.

Lubbock Swine Breeders housed sows in stalls starting in 1964/1965.  These stalls featured a sand area behind them.

To read the full article, click the link below:

The Crate (stall, case,cage, box, etc): Its History and Efficacy – John J. McGlone, PhD

I found it to be interesting reading and hope you do too.

Comments (0)
Feed System Checklist for Hog & Poultry Buildings

Most producers have a checklist for basic equipment repairs between groups to prevent costly and time-consuming problems later. One commonly overlooked item is the feed delivery system. Whether you choose to have the auger inspected by a service crew or do the work yourself, the following is a checklist of essential feed system maintenance items for producers to consider.

Remove the Feed
The most important and basic procedure for auger maintenance is to empty all the feed from the system. Feed left in the auger tube will draw moisture and cause the auger flighting to rust.

Upper and Lower Boots
The metal lower boots should be visually inspected for worn or rusted areas, bent slide gates and damaged access covers. GrowerSELECT® components can be used to replace individual items including body weldments for all flexible auger sizes. Go to GrowerSELECT Unloader Components.

Grower Select clear upper boots can replace existing solid boots so potential problems with feed delivery are easier to spot.  Injected from impact-resistant transparent polycarbonate, GrowerSELECT boots will fit any 16” bin opening and are available in 30° or straight models. Go to GrowerSELECT Clear Boots

Anchor Bearings
Auger bearings are a high wear item and should be checked whenever they are squealing or rattling. To inspect the anchor bearing, loosen the U-bolts holding the bearing, pull the bearing out from the tube and clamp a vise grip on the auger to hold it in place. Inspect the anchor bearing for visible wear and excess play. If the bearing needs to be replaced, select a GrowerSELECT anchor bearing that matches the size and brand of your system. Go to GrowerSELECT Anchor Bearings

Flexible Auger
Auger that is more than ten years old or installed with multiple turns should be examined for wear. Examine the auger to look for sharp edges concentrating on the elbow areas. Also check the distance between the flighting making sure this distance has not been compacted or stretched. To remove the auger for inspection; detach the anchor bearing from the auger and allow the auger to retract inside the tube. Go up to the drive unit and open the inspection plate on the control unit. Loosen the hex head bolt on the clamp holding the auger to the tube anchor. Holding the auger solid, rotate the anchor counterclockwise until the auger is free. Go back to the boot area and pull the auger out the back end of the system.

There are several options for repair.
A) Replace the entire auger.
B) Cut out and replace only the worn section.
C) Turn the auger end for end and replace. This will place the worn section of auger in a straight section of the tube instead of in an elbow section.

Grow-Flex™ auger is available custom lengths that are cut to order. Go to Grow-Flex™ Auger

Elbows
Many (most?) 10-year auger systems have duct tape over small holes in the tube where the auger enters the barn. Now is the time to replace the high wearing elbow sections while the auger is removed from the system.

Gear Head Oil
The oil in auger gear heads should be completely replaced every two years. Remove the bottom and side plugs allowing the oil to drain out of the gear head. Replace the bottom plug and refill with oil until it reaches the level of the side plug. Replace side oil plug. GrowerSELECT Gear Oil is specialty 80W-90 oil designed for use in any existing auger gear head. Purchase GrowerSELECT Gear Oil here.

Pinion Gears
It is also a good time for a visual inspection of the pinion gear connecting the motor shaft to the gear head. The teeth of the pinion should be sharply cut; pinions with rounded teeth should be replaced. There is a GrowerSELECT replacement pinion gear for most existing auger systems….Go to GrowerSELECT Pinion Gears

Feed Level Controls
Faulty feed controls can cause feed outages or wastage when they malfunction. There are many options of GrowerSELECT feed level controls available for replacements. The HS529 is a direct replacement for feed level controls mounted in the feeders. The Proxy Plus (HS10) and the Proxy Classic (HS09) are GrowerSELECT replacements for existing proximity switches.
This may also be a great time to consider a complete change in feed control switches. The Grower Select Drop Tube Control Switch (HSDTC01) is an excellent option for controlling the feed system. This type of switch removes the electrical components from inside the feeders helping minimize switch failure due to electrical problems.

Feed Bins
Older feed bins may have rusted areas or even pinholes in the exterior metal sheets. An excellent product to restore these areas and extend the bin’s useful life is AMC100L; an aluminum based coating that provides corrosion and weather protection. It is available in DIY kit form containing 1 quart of AMC100L, 1 pint of rust remover and 4 pieces of seam tape. This starter kit will cover 200-300 sq ft. Purchase the AMC100L-K kit here.

Producers have also upgraded feed bins with a simple feed level indicator called the Bin Flag. This low-cost device (just over $100) allows operators to check bin feed levels without climbing. No wiring is required for operation and the installation is all done from the outside. The Bin Flag can also be connected to building alarm system for dialer notification of feed outages. Go to Bin Flag.

Contact a local Hog Slat store (see store listings) or go to http://www.hogslat.com/feeding-systems-componentsto order feed system repair items. Hog Slat stores also have service crews available for on-farm repairs and inspections.

Comments (0)