Close
0
You have no items in your shopping cart.
Search
Filters
RSS

Blog posts tagged with 'poultry feed system'

GrowerSELECT…Change the Way You Buy
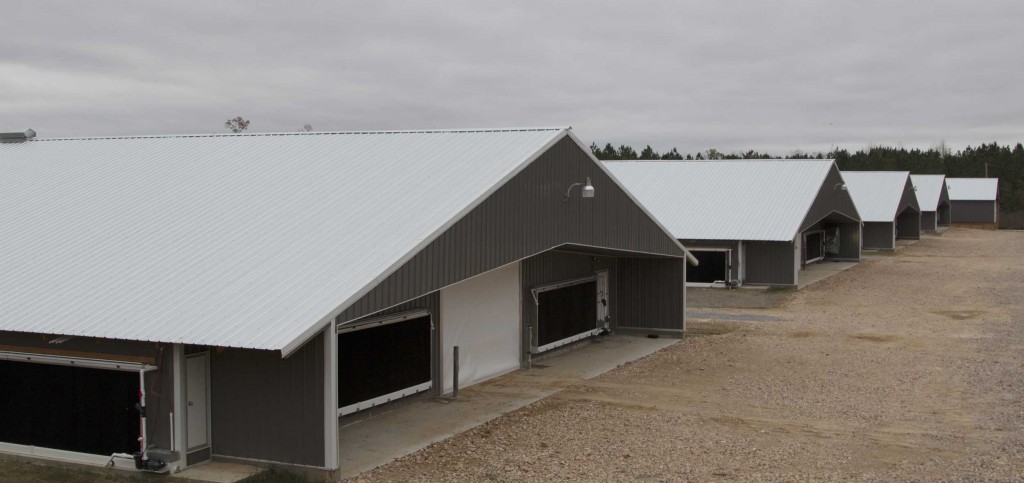
Broiler houses at a Georgia farm.

Broiler houses at a Georgia farm.

When it comes down to it, the cost of manufacturing a high-quality product is the same for most companies producing equipment for the livestock and poultry markets. Most companies have identified the most efficient methods to build an anchor bearing, motor, feeder, nipple waterers, etc.


The real cost difference comes from the delivery of those products to the end user. The standard model of distribution, in our industry, involves a manufacturer producing a product line, warehousing it, and employing a sales force to establish a dealer network.


The dealer network stocks the equipment, maintains a storefront, hires salespeople, installs, and services the production systems in a local area for the brand of equipment they represent.

This particular type of distribution model has changed very little over the history of the livestock and poultry production industries. Each member of this distribution model is an independent business entity and is free to add whatever margins they deem necessary (or possible) to the final cost a producer pays.
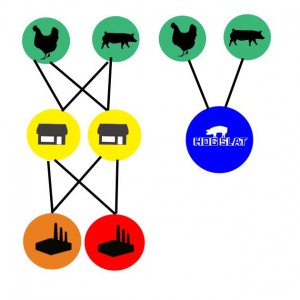
GrowerSELECT supply chain removes extra dealer margins to producer.

GrowerSELECT supply chain removes extra margins to reduce the final cost to end users.


Sold through a different type of distribution model, GrowerSELECT goes directly to livestock and poultry growers through our network of regional local stores. Because we own the distribution chain from top to bottom, we add only ONE MARKUP over our cost.


Our cost is based on finished goods plus ONE MARKUP vs. MULTIPLE MARKUPS from the typical distribution model.


Also, we would suggest that we are the low-cost producer for most products. Wait a minute; the first paragraph said the cost of manufacturing was the same for everyone.


True. But if a brand has a loyal dealer network, the pricing to the dealer network will not be challenged. A loyal dealer will continue to buy brand name products even if the cost is excessive.
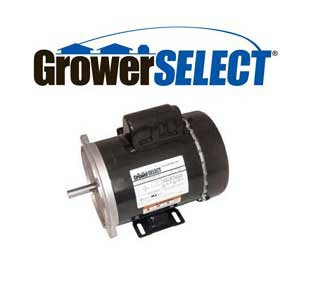
 

GrowerSELECT auger motor with 2 year warranty.

GrowerSELECT auger motor with 2-year warranty.

Name brand motors are a perfect example of this. An auger or fan company buys a motor from a motor manufacturer, puts their logo on it and sells it to a local supplier. The local supplier sells the motor to the end user adding little value to the final price. A local supplier has few other options. Their volume of a particular motor isn’t high enough to go directly to a motor manufacturer, and they have little negotiating power with their chosen brand vendor. The brand company has little incentive to lower the cost to a loyal dealer network. In fact, a brand company can charge different prices in different geographical locations depending on market pressure.


Compare this with GrowerSELECT motors. Our network of over 70 store locations and turnkey construction business allows for large purchases of motors direct from a manufacturer. We forecast purchase amounts for each store location and ship directly with minimal warehousing cost. Local retail pricing continually drives us to buy at a more competitive price.


The conventional distribution chain is directed from the TOP DOWN versus the GrowerSELECT model which is driven from the BOTTOM UP. Lower pricing for comparable products is the result.


The GrowerSELECT distribution model also affects product responsibility. Because we interact directly with the end users, we deal directly with any problems arising with the installed products. We sell it; we service it, and the end user works with one company.


The traditional marketing chain allows room for some question regarding who is responsible for dealing with equipment failures when those problems arise. The manufacturer can blame poor installation, dealer system design, or a number of other reasons (excuses) for a product’s failure. A local supplier can blame the brand company for poor design or manufacturing flaws. The GrowerSELECT distribution system eliminates “finger pointing” and focuses on providing accountability to each and every customer.

gold-coins-on-calculator-with-GS-logoOur customers produce commodities. The lowest cost commodity producer is always the most successful. Our mission is to provide our customers long term value at the lowest possible cost.


Ask yourself this question; “Are all the manufacturers, distributors, dealers, installers, and service personnel creating ADDED VALUE in the distribution chain I buy from?” If you hesitated while answering that question, take the next step by changing the way you buy and implementing GrowerSELECT equipment into your operation.

To contact a sales representative in your area or find our nearest locations to you, click here.

Comments (0)
Poultry Grower Competitive with GrowerSELECT Feeders
Billy Dossett in front of his 4) 44' x 500' Broiler Houses at Windy Hill Farms.

Billy Dossett in front of his (4) 44′ x 500′ broiler houses at Windy Hill Farms near Collins, MS

When Billy Dossett decided to replace the 14-year-old feeding system in his broiler houses, he turned to Georgia Poultry to supply the equipment.

The Collins, Mississippi grower, explained; “We had started growing a heavier bird and wanted to change from a three on ten to a four on ten arrangement for extra feeding space. We installed the GrowerSELECT Classic Flood feeders in two buildings and a leading competitive brand in two other buildings. Over the next year, we trialed the two feeders side by side over five flocks. The Classic Flood feeders came out on top for feed conversion in four out of the five flocks.”

GrowerSELECT Classic Flood pan feeders.

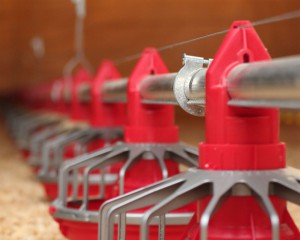
GrowerSELECT Classic Flood pan feeders.

Billy continued, “The GrowerSELECT feed systems just haven’t given me any trouble, and the performance is great. I feel like I can be competitive with anybody using GrowerSELECT equipment. A grower needs to look down the road when it comes to choosing equipment. With my old equipment, a replacement motor would cost close to $500. That same part from GrowerSELECT is less than $200. Maintenance costs can add up in a hurry if you’re not careful.”

Billy-&-Derin_web

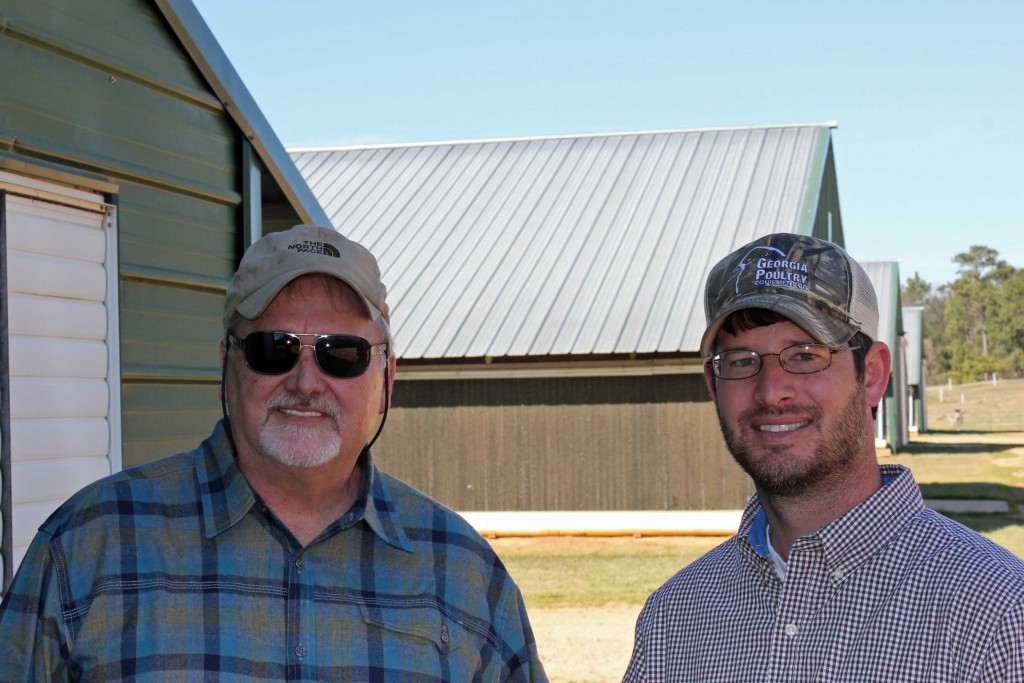
Billy and Georgia Poultry sales representative Derin Bonner

“The folks at Georgia Poultry have been there every time I’ve needed something. Poultry equipment is specialized, and you can’t just pick up spare parts at a hardware store. I like having a stocked parts store close to me for emergency repairs.”

Watch the Classic Flood video below or go http://www.hogslat.com/classic-flood-poultry-pan-feeder to learn more about the advantages of  GrowerSELECT’s Classic Flood poultry feeders.

Comments (0)
No Need to Climb a Feed Bin

Every once in while you run across a product that is such a simple answer to a problem that you just have to say “Wow, why didn’t somebody think of that a long time ago?”

The severe winter of 2010 had us looking for an answer to monitor feed levels in bulk bins. Remember that winter?  Record snow, cold, windy…feed outages were a real problem. Nobody can or should climb an icy ladder in that kind of weather. There are some existing  solutions like load cells and sonar systems, but we were looking for a simpler, less expensive way to check feed levels and protect against feed outages.

So we started looking into a ways to accomplish feed level monitoring…electronic sensors mounted in the bin walls, electric sensor cables hung in the bins, sonar bouncing devices from a fish finder…

One of the biggest problems that we kept coming back to was that all these methods required power be run to the bins to operate them.  Extra expense……harder to install…more of a chance for break downs and failure to occur.

Then along comes the Bin Flag….

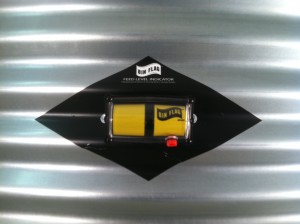
A simple, mechanical device that uses a paddle inside the bin to rotate a sight cylinder to indicate when material is present.  Primarily used in industry applications to monitor levels in hopper for materials like sand, gravel, plastic beads…… it is the perfect device to measure feed levels for swine and poultry bulk bins.

It meets all the criteria we had established

1)      No electricity to operate

2)      Installs from the outside of the bin and you don’t need to lift the bin to install

3)      Low cost

4)      Flexible: basic method would be install a unit just above the cone to know when it is critical to order feed.  Producers also have the option of adding additional Bin Flags for more advanced monitoring.

5)      Very visible: big added bonus.  You can visually see the Bin Flag from up to 200 feet away.  You know in a glance from across the yard how much feed is in the bins….drive by a site and check feed levels from your truck seat. It doesn’t have to be cold for that to be a bonus.

There are more details online….go to http://www.hogslat.com/bin-flag-feed-level-indicator to order today.

There’s even a way to hook up Bin Flag to your existing alarm to call you when feed levels drop to a critical level.  We’ll talk about that in the next blog or so.

Comments (0)
Have the Bin Flag Call You

Okay I admit it…it has been awhile since we’ve posted a blog. But I have an excuse…We’ve been working on some new ad campaigns and new swine and poultry catalogs (which you can request a copy of here.) But now we are back…ourlast blog was about the Bin Flag and at the end we mentioned a way to connect it to a phone alarm dialer.

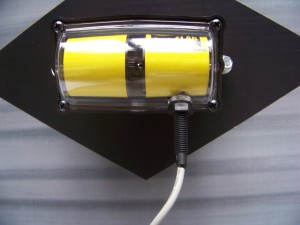
When you pair the Bin Flag with a alarm phone dialer you will receive a phone alarm whenever feed levels drop below the critical level.  Setting the Bin Flag up with most alarm systems is a pretty simple process.   Purchase the magnetic sensor for less than $20 (item #HDL59065-952) and screw it into the Bin Flag.  You then run common phone wire from the sensor to a contact on the phone dialer.   The alarm system will allow you to program a unique message that identifies each particular bin.

Really I’m not so sure this isn’t a more important feature than the visual part of the Bin Flag…normally you have to be at the building site and look at the Bin Flag. But with the Bin Flag connected to an alarm it calls you. So whether you are in the field, on the road, and wherever you have cell service you will be notified when a feed outage occurs and have to time to react and get feed ordered.

You can learn more about setting up the Bin Flag with the Sensaphone and Agri-Alert alarm systems by going to our website and reading the manual we have located under our Resources section.

Comments (0)
New Lease on Life for Broiler Houses

Kip and Michelle Cullers took a hard look at their existing broiler operation and decided changes needed to be made. First put into operation in 1989, the six 22-year old buildings were in need of major renovation to qualify for premium payments.

After exploring their options with MoArk, a leading producer of specialty eggs, the Cullers next contacted Mike Lucariello who heads up Georgia Poultry’s operations in the area.

Working with the existing 40’ x 400’ dimensions, Mike put together a layout designed to house 12,500 hens per building. The layout features two rows of Wadeken center belt nests set up on a flat deck of plastic slats with a lowered center scratch area. New chain feeders and the old drinker systems, outfitted with cups, were installed on the deck area between the nests and the exterior walls.

The ventilation system was upgraded with the addition of seven 52” Windstorm fans and a 5’ x 55’ cool cell system on each side of the building. The system also unitizes the existing curtain system that can be manually activated during mild weather.

To complete the project, a 20’ x 40’ egg room was added to each building. The bulk of the egg collection is done in the morning with center belts moving the eggs to the end of the building where they are placed into flats, stacked on wheeled racks and moved to the egg cooler until pick up every Tuesday and Friday.

Kip commented, “We had complete confidence in turning the project over to Mike. He’s been in the chicken industry for a long time and has broiler and laying houses of his own. We are especially pleased with the way the ventilation system performed last summer. The tunnel system combined with the cool cell system kept the hens comfortable; in fact, we experienced no loss of production despite the record heat we had.”

Kip continued, “Michelle is responsible for the day-to-day operations on the farm. She does an outstanding job keeping up with the paperwork necessary for organic egg production. Plus she manages two full time employees and four part timers who gather eggs. I help out with repair and maintenance as the farming operation and travel allows.” (In case you are wondering whether you have heard Kip’s name before, you may have. He holds the record for soybean production at 160.6 bushels per acre and travels worldwide speaking about his production methods).

To find out more contact us at 800-949-4647. We’ll sit down with you, explain your options and help you put together a plan and cost estimates for remodel or new projects.

Comments (0)
Better Start for Broilers

One of the steps in adding new items to our product line is on the farm testing.  Mike Lucariello, regional manager for Georgia Poultry in Missouri and Arkansas, did the initial trials using starter feeders vs. feed trays in his broiler houses.  We talked on the phone recently about his experiences.

How did you set up the trial?

Mike: “We took two houses and randomized the birds evenly between the breeder flock sources to eliminate any possible differences.  In one house we fed the chicks on traditional feed trays and in the other we set starter feeders under the feed lines. We then weighted the chicks at 7, 14 and 21 days.  The chickens in the starter feeder house were routinely 8-12% heavier than feed tray house.  We repeated the trial this time, switching the houses between trays and feeders and had almost identical results…..starter feeders are now part of our routine.


Describe how you set up the house with starter feeders?

Mike: Each of our houses holds 23,500 birds and we aim to have one supplement feeding station per 75-100 birds.  We can place 150 starter feeders between the pan feeders under the feedline. We also like to remove the pan under the control pan and replace it with a large 3×3 cardboard tray so the chicks will activate the control pan quicker.   We add additional 100 paper trays under the brooders that we feed by hand for 3 days.  After that we pick up the paper trays and replace the pan on the end control and all the supplemental feeding is done in starter feeders.


Any ideas why the chickens were heavier in the building using starter feeders?

Mike:   Yes, it is easier to keep supplemental feed in front of the chicks.  Using feed trays requires the grower to manually operate the feed system.  They have to run the feed system several times a day to put feed on the trays.  This becomes increasing difficult, as the chicks get older and more aggressive and start scattering feed as it drops in the trays in the front of the house. The grower has to shut off the front drops as they fill the trays so feed will be delivered equally to the end of the brooder area.   With the starter feeders you simply position the feeders under the feedline and fill them up.  Within a couple of days the control pan is regulating feed delivery automatically and distributing it down the entire length on the house.   Supplemental feed is always available to the birds.


Most growers would like to put out supplemental feed for ten days but with feed trays this can be a challenge.  Since the system is manual it’s a little bit of a guessing game to know how much feed to run out.  The chicks lie in the trays, scatter and defecate in the feed.    A real aggressive flock will waste so much feed growers will stop supplement feeding after eight days.


With starter feeders the birds can’t lay in the feed, they aren’t scratching feed into the litter and feed is always available.  We can easily keep supplemental feed in front of the chickens for 15-16 days with very minimal wastage.


That early feed intake is critical.  The faster we can get their allotment of starter rations into the birds the heavier those chickens will be at settlement.


We understand not everyone is proponent of starter feeders?

Mike: Yes that’s true.  Some people will argue feed trays provide more eating space.  Consider this, when there are 100 birds lying in a feed tray, access is very limited.   We think their access to feed is increased vs. trays because birds are not covering up the feed.


Do you clean the feeders between flocks?

Mike: No, because the birds can’t mess up a starter feeder like they do a plastic feed tray.  We save quite a bit of labor not having to clean the feeders like we would if we used plastic trays.


Georgia Poultry is now offering an even better price on starter feeders than ever before.  Go to www.hogslat.com/hi-grow-pre-starter-chick-feeder.  Run a trial on your own farm.   Start birds faster and gain a competitive advantage at settlement.

Comments (0)
Extended Anchor Bearing Solves Tandem Bin Auger Overload

As livestock and poultry housing became larger and we developed more sophisticated feeding methods, the use of multiple bins in tandem was more common.  While this set-up allowed for greater flexibility in feeding, the front bin of the pair was often prone to plugging.

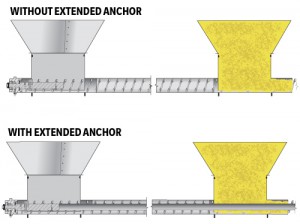
If we look at the anchor bearing that is present in the rear bin, one would notice that it has a restrictor tube over the shaft.  This restrictor tube fills the core of a flexible auger and prevents feed from filling the core and overloading an auger. This restrictor is not present in the front bin.  When the slide is opened feed overloads the system faster than the auger will move it away.  The obvious solution is to cut the opening down by closing off the slide to restrict feed flow.  This can cause other problems as a feed flows tends to flow only down one side of the bin.  A better solution is to use baffles in the boot to restrict feed flow.  This works to prevent plugging but can cause feed bridging in the bin.


feed-bin-auger-drawing-anchor-bearing


Over the last several years Hog Slat developed and tested a unique solution to this problem.  The final product is called the Extended Anchor Bearing.


Described simply, the Extended Anchor Bearing extends the rear tube restrictor to the front bin.  The auger core is filled in and feed cannot overfill the system.

The Extended Anchor Bearing ships complete with a 14’ restrictor tube, replacement bearing and fastening hardware.  The 14’ restrictor tube is cut to length and inserted it the auger core.  The new bearing is installed and the auger reattached.

If an extended anchor bearing would help you prevent auger overload, visit the Hog Slat website to find the model that fits your flexible auger fill system.

Comments (0)
Clear Advantage for Clear Feed Tray

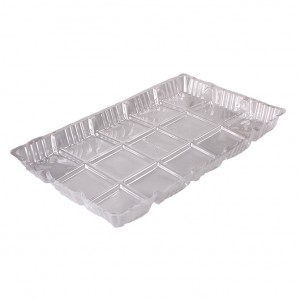
Hog Slat/ Georgia Poultry stores just received their first shipments of a new type of feed tray.  Manufactured from post-consumer waste, the Pur-Chick Clear Feeder Tray is different than the paper or plastic trays currently in use.

itm-521102-clr-img

They are crystal clear, lightweight, disposable and appear to have some advantages over red plastic and paper trays.

There seems to be less Darkling beetle activity in the clear trays.  I asked several industry “bug experts”, and they weren’t sure why.

“Maybe it’s because they can’t hide under the clear tray.”

“The sides might be too slick for the beetles to climb.”

“They can’t eat through the plastic as easy as the paper tray.”

Watch the first part of the video and see for yourself.

Chicks seem to be attracted to the clear trays over paper or red plastic.  Again, not sure exactly why.

 “They can see the feed better because the trays are clear.”

“The reflective surface might look like water.”

“When they walk on the tray, it makes a crinkling sound which they are familiar with from the hatchery.”

Maybe. Watch the video and decide for yourself.

To order go to http://www.hogslat.com/pur-chick-clear-feeder-tray

Part # for individual trays is 521102-CLR
Bundles of 200 are part# 521102-CLR-BUND

Comments (0)
Feed System Checklist for Hog & Poultry Buildings

Most producers have a checklist for basic equipment repairs between groups to prevent costly and time-consuming problems later. One commonly overlooked item is the feed delivery system. Whether you choose to have the auger inspected by a service crew or do the work yourself, the following is a checklist of essential feed system maintenance items for producers to consider.

Remove the Feed
The most important and basic procedure for auger maintenance is to empty all the feed from the system. Feed left in the auger tube will draw moisture and cause the auger flighting to rust.

Upper and Lower Boots
The metal lower boots should be visually inspected for worn or rusted areas, bent slide gates and damaged access covers. GrowerSELECT® components can be used to replace individual items including body weldments for all flexible auger sizes. Go to GrowerSELECT Unloader Components.

Grower Select clear upper boots can replace existing solid boots so potential problems with feed delivery are easier to spot.  Injected from impact-resistant transparent polycarbonate, GrowerSELECT boots will fit any 16” bin opening and are available in 30° or straight models. Go to GrowerSELECT Clear Boots

Anchor Bearings
Auger bearings are a high wear item and should be checked whenever they are squealing or rattling. To inspect the anchor bearing, loosen the U-bolts holding the bearing, pull the bearing out from the tube and clamp a vise grip on the auger to hold it in place. Inspect the anchor bearing for visible wear and excess play. If the bearing needs to be replaced, select a GrowerSELECT anchor bearing that matches the size and brand of your system. Go to GrowerSELECT Anchor Bearings

Flexible Auger
Auger that is more than ten years old or installed with multiple turns should be examined for wear. Examine the auger to look for sharp edges concentrating on the elbow areas. Also check the distance between the flighting making sure this distance has not been compacted or stretched. To remove the auger for inspection; detach the anchor bearing from the auger and allow the auger to retract inside the tube. Go up to the drive unit and open the inspection plate on the control unit. Loosen the hex head bolt on the clamp holding the auger to the tube anchor. Holding the auger solid, rotate the anchor counterclockwise until the auger is free. Go back to the boot area and pull the auger out the back end of the system.

There are several options for repair.
A) Replace the entire auger.
B) Cut out and replace only the worn section.
C) Turn the auger end for end and replace. This will place the worn section of auger in a straight section of the tube instead of in an elbow section.

Grow-Flex™ auger is available custom lengths that are cut to order. Go to Grow-Flex™ Auger

Elbows
Many (most?) 10-year auger systems have duct tape over small holes in the tube where the auger enters the barn. Now is the time to replace the high wearing elbow sections while the auger is removed from the system.

Gear Head Oil
The oil in auger gear heads should be completely replaced every two years. Remove the bottom and side plugs allowing the oil to drain out of the gear head. Replace the bottom plug and refill with oil until it reaches the level of the side plug. Replace side oil plug. GrowerSELECT Gear Oil is specialty 80W-90 oil designed for use in any existing auger gear head. Purchase GrowerSELECT Gear Oil here.

Pinion Gears
It is also a good time for a visual inspection of the pinion gear connecting the motor shaft to the gear head. The teeth of the pinion should be sharply cut; pinions with rounded teeth should be replaced. There is a GrowerSELECT replacement pinion gear for most existing auger systems….Go to GrowerSELECT Pinion Gears

Feed Level Controls
Faulty feed controls can cause feed outages or wastage when they malfunction. There are many options of GrowerSELECT feed level controls available for replacements. The HS529 is a direct replacement for feed level controls mounted in the feeders. The Proxy Plus (HS10) and the Proxy Classic (HS09) are GrowerSELECT replacements for existing proximity switches.
This may also be a great time to consider a complete change in feed control switches. The Grower Select Drop Tube Control Switch (HSDTC01) is an excellent option for controlling the feed system. This type of switch removes the electrical components from inside the feeders helping minimize switch failure due to electrical problems.

Feed Bins
Older feed bins may have rusted areas or even pinholes in the exterior metal sheets. An excellent product to restore these areas and extend the bin’s useful life is AMC100L; an aluminum based coating that provides corrosion and weather protection. It is available in DIY kit form containing 1 quart of AMC100L, 1 pint of rust remover and 4 pieces of seam tape. This starter kit will cover 200-300 sq ft. Purchase the AMC100L-K kit here.

Producers have also upgraded feed bins with a simple feed level indicator called the Bin Flag. This low-cost device (just over $100) allows operators to check bin feed levels without climbing. No wiring is required for operation and the installation is all done from the outside. The Bin Flag can also be connected to building alarm system for dialer notification of feed outages. Go to Bin Flag.

Contact a local Hog Slat store (see store listings) or go to http://www.hogslat.com/feeding-systems-componentsto order feed system repair items. Hog Slat stores also have service crews available for on-farm repairs and inspections.

Comments (0)
New Feed System Cross Reference

ITM-GrowerSelect collage-IMG

Many producers utilize Grower Select® products to lower their production costs. Paying 30% less for repair parts reduces maintenance costs in livestock or poultry buildings and increases the bottom line.

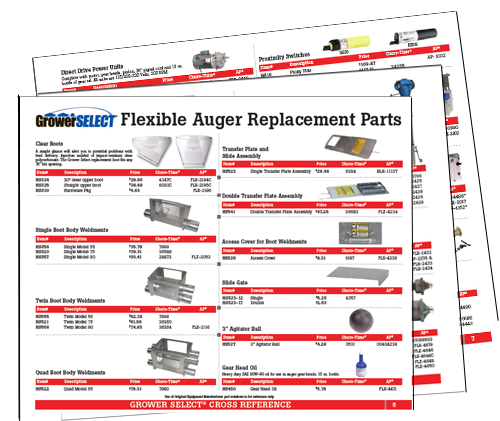
There may some hesitation by producers to take advantage of these savings because they are not sure which Grower Select® part number to use when repairing Chore-Time® or AP® feed systems.

ITM-GS CROSS REF-IMG

To make the correct selection easier, we have created a new cross reference for Grower Select® feed system parts. Simply find the OEM part number in the list and cross reference to the matching Grower Select® part number. Download the Grower Select® Feed System Parts OEM Cross Reference Sheet.

Our new Fall/Winter catalog also contains the Cross Reference list.2014 Fall:Winter catalog cover

To order a FREE copy online, click on Catalog Request.

Comments (0)